Wiren Board 4:Getting started
Это утверждённая версия страницы. Она же — наиболее свежая версия.
Before you start
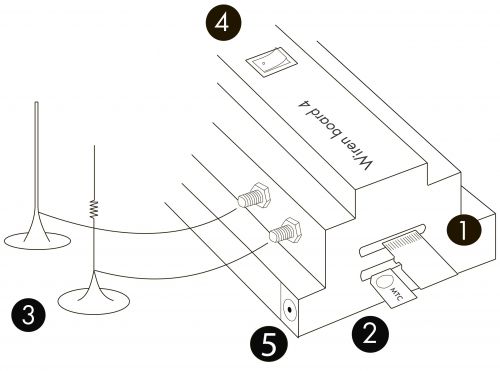
- Check the microSD card.
- The memory card with the software image is supplied in the kit and is usually already inserted ( into the top connector contacts inward upwards). If you don't have a microSD card, follow the instructions.
- Установите microSIM (optional).
- microSIM-карта is inserted into the lower connector with the contacts facing downwards at a cut-off angle.
- Connect external antennas.
- Screw the GSM and 433MHz antennas (optional) to the SMA connectors.
- Turn off the button on the front panel.
- Connect the power supply.
- Plug the power supply into the connector. If you are using a DIN rail or other power supply without a connector, simply clamp the wires into the Vin and Gnd terminals. It is also possible to power Passive Power over Ethernet.
The first start
- The first time the device is turned on may take a long time (5-6 minutes). The device will boot (the indicator on the front panel will turn red to green), create private keys for SSH and initialize the serial number of the device, and reboot again. When the indicator turns green for the second time, you can start working with the device.
- To access the web interface, you need to know the IP address of the controller. How to do this, see How to find the IP address of the controller.
- You may need to access the controller console to configure the controller. This can be done either over the network via SSH or by connecting directly to the Debug UART port.
Software Update
We recommend you to upgrade your software. See [1]
