Wiren Board 5:Getting started
Это утверждённая версия страницы. Она же — наиболее свежая версия.
Before turning on
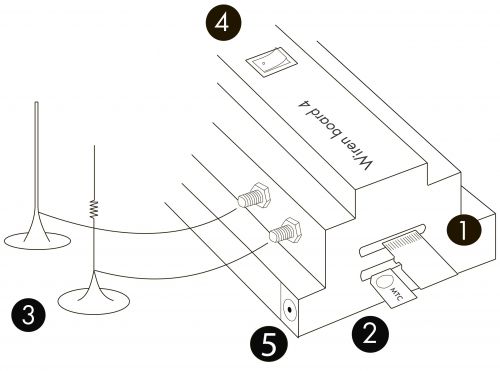
- Set the micro SIM (optional).
- Connector located on the left side of the controller.
- microSIM-card is inserted into socket contacts up , cut-off corner inside.
- Connect the external antenna.
- Screw the antenna GSM, Wi-Fi and 433 MHz (optional) connectors to the SMA.
- Plug the power supply.
- The power supply can be connected to the connector side. If you use a power supply for DIN-rail or other without connector, simply hold the wires in the terminals Vin and Gnd. It is also possible power Passive Power over Ethernet.
The first start
- The first switch device may take a long time (5-6 minutes). The device will boot (LED on the front of the red becomes green), create secret keys for SSH and initialize the device serial number, and reboot again. When the indicator starts blinking green, you can start working with the device.
- Чтобы зайти в веб-интерфейс, надо узнать IP-адрес контроллера. Как это сделать, смотрите в статье Как узнать IP-адрес контроллера.
- Для настройки контроллера может понадобиться получить доступ к его консоли. Сделать это можно либо через сеть по SSH, либо подключившись напрямую через отладочный порт Debug UART.
- To go to the web interface, you have to know IP-address of the controller. How to do it see the article How to know IP-address of the controller.
- To set the controller may need to access its console. This can be done either through a network of SSH, or connect directly via the debug port Debug UART.
Software Update
If the controller is not used for a long time, we recommend to update the software.
Main article: Wiren Board Software Update
